6 Home Maintenance Tasks You Have to Do
Home maintenance and ownership go hand in hand, so you’re no doubt aware that there’s plenty you should be doing (hello, gutter cleaning!). Sorry to lengthen your to-do list, but we thought you should know that there are actually a few more home maintenance tasks that may require your attention—and odds are you don’t even realize it.
Curious what you might be overlooking? Here are some home maintenance chores that might be flying under your radar—and why they’re important to cross off your list.
1. Clean your refrigerator drip pan
Did you know many refrigerators have drip pans? I did not. But as you can imagine from the name, it’s a thing you really should be cleaning once in a while. Doug Rogers, president of Mr. Appliance, puts it this way: “Failing to clean the refrigerator drip pan will result in mold growth.” Yuck.
How to do it:
To clean it, first you have to find it.
“Remove the kick panel at the bottom of your fridge, and trace the defrost drain line to the pan, which is where it empties out,” says Rogers. Use a flashlight if you need to. “Be sure to gently pull the pan out as it may be full of water, and dump any excess liquid in the sink before cleaning with an all-purpose cleaner,” he says.
2. Flush the water heater
“Flush” the water heater? What does that even mean? Great question. According to Doyle James, president of Mr. Rooter plumbing, you need to remove the water sitting in your water heater to remove any sediment that may collect there. “Sediment causes corrosion, reduces efficiency, and shortens your water heater’s life span,” James explains.
How to do it:
First, turn off the electricity or gas to the heater. Open a bathroom hot water tap and let the hot water run for a few minutes to lower the temperature of the water in the heater. Then shut off the cold water valve at the top of the tank, and put a bucket under the water heater drain valve. Open the valve and drain the water until it runs clear, with no sandy stuff. Be careful, because the water can come out hot! When it’s clear, put everything back the way it was and you’re done until next time.
To keep your water heater running at its best, James advises setting the temperature no higher than 120 degrees Fahrenheit.
3. Reseal your grout
When your tile was installed, whether it’s floor tile, bathroom surround tile, or countertop tile, the grout was sealed to protect it from wear and tear. But did you know that you’re supposed to reseal it every year? If you said no, you’re not alone.
“You have to reseal grout every year, and most people don’t,” says Debbie Gartner of The Flooring Girl blog.
The reason: Most grout is a mixture of sand and cement, which can absorb water, bacteria, and stains.
“A grout sealer protects your grout so it’s waterproof,” explains Gartner. Sealing will help your grout look better and last longer. The only exception is epoxy grout, which is generally used with glass tile.
How to do it:
To reseal grout, apply grout sealant, wipe off any excess that gets on tiles, wait 15 minutes, apply a second coat, then clean the tiles again. Let it cure for 24 to 48 hours. After it cures, test it: Water should bead on top of the grout instead of being absorbed.
Here’s more on how to reseal grout.
4. Test for water leaks
Checking for water leaks around the home—even small, slow ones—will pay off big-time down the road. Why? It can help you save water (and money on your water bill); but more importantly, it will eliminate damage to your house done by water behind the walls or in other hard-to-see places.
How to do it:
“Take a water meter reading and avoid using your water for a couple of hours. After two hours, if the reading changes, you have a leak,” James says.
If you have a leak, inspect the pipes of your water-using appliances like the dishwasher and washing machine for cracked, bulging, or damaged hoses. Leaky hoses are easy to replace yourself. If, however, the damage is more extensive, you can hire a plumber.
5. Reseal stone countertops
If you have granite or marble countertops, you should be sealing those babies every year, or possibly more often. The only exception is if you have a presealed countertop. In that case, you’re excused from this one. Not sure if you need to seal? Put some water on your countertop. The more quickly it is absorbed, the more porous your stone is, and the more frequently you should be sealing. That’s also a good test to see if your sealer has worn off: If the water doesn’t bead on the countertop, it’s time.
How to do it:
Wash your countertop with mild soap and water, and wipe it dry. Apply a stone sealer, let it sit 15 minutes, then wipe away the extra.
Here’s more on how to reseal countertops.
6. Wash your dryer lint screen
You know that thing gets gross, right? You’re always scraping piles of lint, shredded tissues, and other weird substances off of it. But it can get clogged in less obvious ways, too. The residue from dryer sheets and fabric softener can start to build up on the screen, blocking the airflow. That can lead to less efficient drying and even fires.
How to do it:
“Soak it in hot water and dishwashing soap designed to remove grease and oil,” says Rogers. “Gently scrub the screen with a soft brush, rinse it, and let it air-dry before reinserting it into the slot.”
It’s a small thing, but it’ll help extend the life of your dryer, reduce your energy bills, and keep your home safer.
NOTE: This part (above) of the article was written by Audrey Ference (@audreyference) for www.Realtor.com. Read original article.
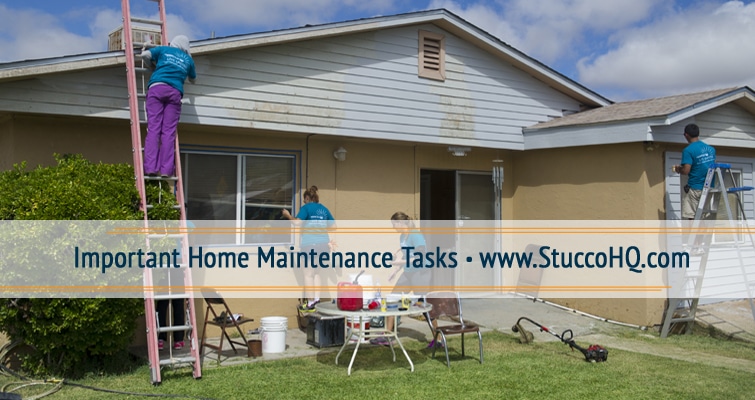
7. Stucco Maintenance
Did we say it was 6 Home Maintenance Tasks You May Not Even Realize You Have to Do? Well this one would be a bonus. This one is equally, if not more important then some.
First of all it is crucial that stucco is installed properly by licensed stucco installation contractor. If it was installed properly stucco can and most likely will protect your home for around 50 years with minimal maintenance.
Even though stucco is very low maintenance home exterior siding homeowner still plays an important part in upkeep and repairs (if needed). We encourage them to examine their exterior frequently. If home is located next to or close to unpaved or dirt roads we recommend examine their stucco exterior wall on monthly basis.
What to do:
One of the very basic thing that you can do is to walk around their home and check for any tiny hairline cracks, splits, or holes in their stucco wall. This will make sure that their home is completely “sealed” by stucco and is protected from moisture intrusion which could lead to mold formation.
If you notice that mold or mildew is present you can mix some bleach with water and apply mixture to the area of stucco wall where mold is present. Wait for a few minutes and then rinse it off. If you still see some mold in an area apply bleach again and scrub the surface gently using a brush. If even after this procedure you can see mold that means that the problem is little deeper and we recommend calling stucco contractor.
By washing your stucco exterior often you will prevent harmful buildups.
If during your little inspection you notice hairline cracking, some tiny holes or any other small stucco damage and you feel confident fixing the yourself you should know that it is very important to take care of small hairline cracks, tiny stucco holes or any tiny stucco damage right away. This article talks about stucco crack repair products and this one will teach you how to fix hairline cracks in stucco.
But please remember… if you wait for too long you might make small and harmless situation worse and this may lead to costly and unnecessary problems that require professional stucco repair contractor involvement.
You may find this stucco maintenance manual useful.
This video will be helpful as well: